This blog explains how to install OBIEE services as Windows Services.
we are going to create windows services for:
- Adminserver
- Managed BI server
To install Admin Server as windows services:
The boot.properties holds the username and password for the weblogic admin server. It is located
{Middleware Home}\user_projects\domains\bifoundation_domain\servers\AdminServer\security
For instance, if you Middleware Home is C:\oracle then
C:\Oracle\user_projects\domains\bifoundation_domain\servers\AdminServer\security

Add the following lines:
Username: Username of the weblogic server
Password: Password of the weblogic server
Create a Command script named installAdmServer_Service.cmd with the following lines like the screenshot below

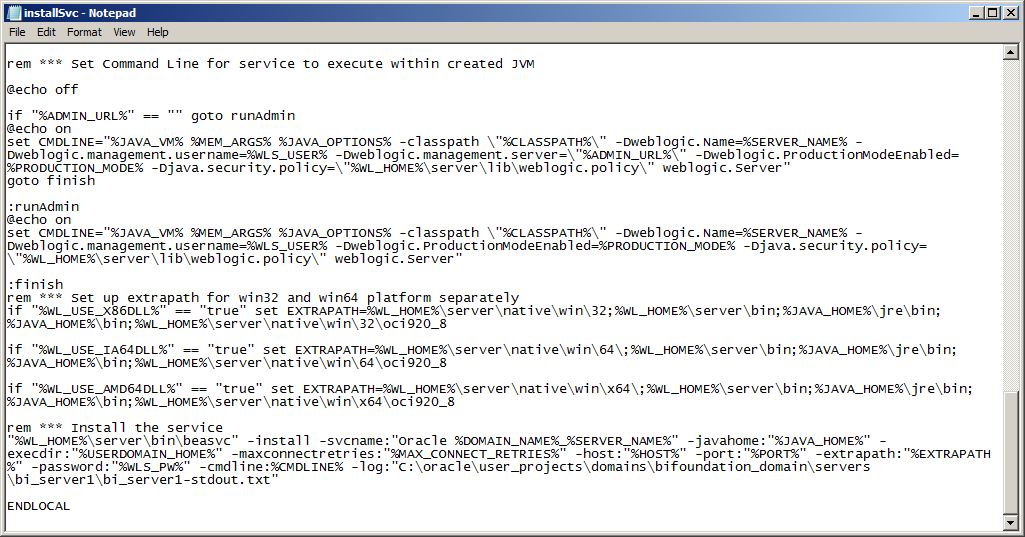
Inorder, for creating a service name beginning with Oracle rename beasvc to Oracle in the installSvc.cmd
for troubleshooting we are going to add a log file at the very bottom of the page like the screenshot below to installSvc.cmd

This will create a Adminserver-stdout text file in c:\oracle\user_projects\domains\bifoundation_domain\AdminServer location.
we are going to increase the heap size of JAVA so that we will not face any ran out of memory issue while starting the service.
The heap size of JAVA can be increased through commonEnv.cmd file which is located in
{Middleware Home}\wlserver_10.3\common\bin.
In my case, it is c:\oracle\wlserver_10.3\common\bin.
set MEM_ARGS increase the values to 512 like the screenshot below.

Now run the installAdmServer_Service.cmd file
This will create a service named oracle bifoundation_domain_AdminServer or beasvc bifoundation_domain_AdminServer if you have not renamed the beasvc.
The service startup will be automatic. However, you can change it to manual.
Start the service to see if it is starting without any error msgs.
You can track the services through the Adminserver-stdout text file.
To install Managed BI Server as windows services:
The boot.properties for Managed BI Server is located in {Middleware Home}\user_projects\domains\bifoundation_domain\servers\bi_server1\security
In my case, it is located in c:\oracle\user_projects\domains\bifoundation_domain\servers\bi_server1\security
Add the following lines:
Username: Username of the weblogic server
Password: Password of the weblogic server
create a Command script named installManagedSrvr_Service.cmd with the following lines like the screenshot below.

Inorder, for troubleshooting we are going to change the log file location in the installSvc.cmd
Now run the installManagedSrvr_Service.cmd file. This should create a service named oracle bifoundation_domain_bi_server1 with startup type automatic.
Inorder, To ensure that OBIEE service start in the correct order we need to create a group in the windows registry for each service. We then assign each of the four services to these groups and place dependencies on the start order.
Open the registry editor by typing regedit on the run command.
Expand HKEY_LOCAL_MACHINE and navigate to ServiceGroupOrder like below
HKEY_LOCAL_MACHINE\SYSTEM\CurrentControlSet\Control\ServiceGroupOrder

Double click the list and add the following lines below.
- OBI Node Manager
- OBI Admin Server
- OBI Managed Server
- OBI OPMN
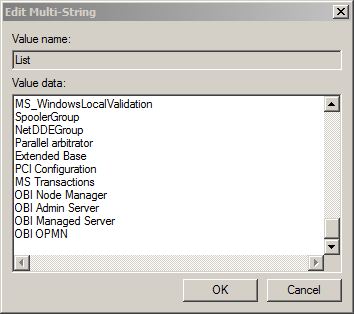
Click ok to Save
Now locate Weblogic Node Manager under
HKEY_LOCAL_MACHINE\SYSTEM\CurrentControlSet\Services
In my case, it is named c_oracle_wlserver_10.3
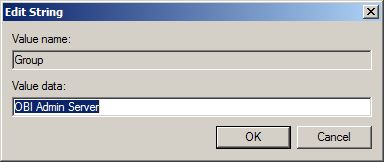
Right Click on the Weblogic Node Manager and Select New –> String Value
Enter the name Group. Double click on the Group and enter OBI Node Manager as the Value data like below

Now, repeat the same process and add a string value Group with Value data OBI Admin Server for Oracle bifoundation_domain_Adminserver like below
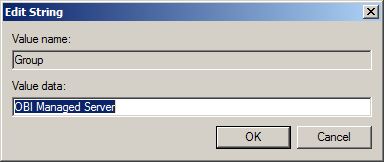
Now, repeat the same process and add a string value Group with Value data OBI Managed Server for Oracle bifoundation_managed_biserver1 like below
Now, repeat the same process and add a string value Group with Value data OBI OPMN for Oracle Process Manager(instance 1) like below

Right click on the Oracle_bifoundation_domain_AdminServer entry and select ‘New’ -> ‘Multi-String value’.
Give it the name DependOnService. Edit the value and enter the name of the node manager service

Now repeat the same steps by creating a DependOnService value for the Oracle_bifoundation_domain_bi_server1 and give it the two values:
Oracle WebLogic NodeManager (c_app_obiee_wlserver_10.3)
Oracle_bifoundation_domain_AdminServer

Finally create the DependOnService value for the OracleProcessManager_instance1 with the three values:
Oracle WebLogic NodeManager (c_app_obiee_wlserver_10.3)
Oracle_bifoundation_domain_AdminServer
Oracle_bifoundation_domain_bi_server1

Now Check the services on the services window and make sure every services has startup type as Automatic.

Restart the server now. All the services will be starting in an orderly fashion.